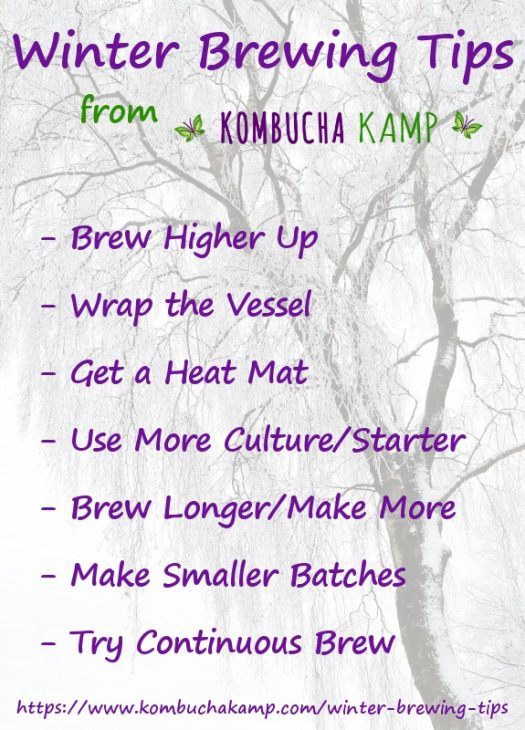
Top 7 Winter Brewing Tips
 Even though it’s many people’s least favorite season, winter is a critical stage in the yearly cycles of most all living things. It’s common to wonder how long to brew Kombucha in winter, along with other ferments like JUN, water kefir or milk kefir.
Even in warmer climes, the changes in air pressure, humidity and of course, temperature during winter all shift the way insects, plants, animals, and yes even our homebrews behave.
The healthy yeast and bacteria, which prefer warmer temps for the best results anyway, slow down when the weather gets cooler. Unless some of these winter fermentation tips are implemented, brewing issues like mold, off flavors, and stuck fermentation are more common at cooler times of year.
Apply any or all of these tips to keep your Kombucha, JUN, Milk Kefir and Water Kefir happy and productive, even as everything else hibernates. Plus we’ve included a few of our favorite “warm you up” flavoring recipes for any ferment!
Why Does Winter Create Brewing Issues?
As experienced brewers already know, low pH (under 4.0) is the home ferment’s key protection from contamination. If the pH remains too high for too long at the beginning of the brewing process, mold in the air and other invaders such as Kahm yeast can colonize the brew. Because the good bacteria and yeast in our brews are less active this time of year, the pH may drop more slowly. During that extra window of time is when brewing problems often emerge.
Many of the techniques below work by lowering the pH more quickly. This may be accomplished by increasing the ratio of SCOBY and starter liquid to sweet tea or by maintaining the proper temperatures.
CLICK HERE to learn more about pH and Kombucha
Winter Brewing Tip #1 – Seek Higher Ground
Everyone has heard “heat rises, cold sinks.” Heat doesn’t actually rise but hot air molecules move faster and have less density than cold air. As cool air seeps in under the door and through cracks in the window, it displaces the warmer air sending it higher. To take advantage of this natural thermodynamic flow, shift your brewing location to a higher location.
Higher ground locations:
- Top of the refrigerator
- High cabinet
- Closet shelf
- Atop or near the dryer in the laundry room
CLICK HERE for more about selecting the right brewing location for all your ferments
“Natural High” Cacao Coffee Flavoring Recipe
The caffeine present in tea is reduced in the final Kombucha through the fermentation process. But you can boost the buzz of any of your homebrew through second ferment with a little coffee (use full strength or decaf for flavor only) and magnesium rich cacao. The cinnamon ties these tastes together and provides additional warming properties. Try this recipe with any of your favorite ferments!
Ingredients – per 16oz (½ liter)
- ½ tsp cacao or cocoa (unsweetened) (AMZ)
- 2 tablespoons brewed coffee (THRIVE)
- Pinch of ground cinnamon (THRIVE, AMZ) or ¼ tsp ofcinnamon chips
Add flavorings to a clean glass bottle (THRIVE, AMZ). Top off with your favorite ferment. Allow it to sit at room temperature for 1-3 days, then move to the fridge if desired. Gently tip the bottle before opening to combine the ingredients throughout. May pour through a strainer to remove excess flavoring.
CLICK HERE for more on How To Flavor Kombucha
Winter Brewing Tip #2 – Snuggle Your Bugs
Another way to help your brews eke out a bit more warmth is to wrap them in a towel or layers of fabric. This can also be a great tool for making your heating mat more energy efficient provided the layers aren’t too thick and still allow the heat to dissipate naturally. We invented our Kombucha Kamp Brewer Tee Sets with this very concept in mind; by covering your vessel and sliding a heater underneath, the warmth is trapped closer to the vessel, helping to achieve the ideal range. Yet the t-shirt material is thin enough to be safely in use 24 hours a day. Think of it as a winter coat for your bacteria buddies!
Snuggle Options:
- Terry cloth towel (AMZ)
- Brewer Tee or Jar Tee Set
- Tea Towel (AMZ)
![]() Kombucha Mamma Sez – BONUS TIP : “If your brew is normally stored on a marble, granite or any counter top that may feel cool to the touch, simply placing a cutting board or towel underneath it will help to keep it warmer. When stored on a cool surface, heat transfer causes the heat to disperse until the counter top and the jar are both at the same temperature. Shifting to a material that isn’t as cold means that less heat will transfer out of the brewing vessel. #physicsforthewin“
Kombucha Mamma Sez – BONUS TIP : “If your brew is normally stored on a marble, granite or any counter top that may feel cool to the touch, simply placing a cutting board or towel underneath it will help to keep it warmer. When stored on a cool surface, heat transfer causes the heat to disperse until the counter top and the jar are both at the same temperature. Shifting to a material that isn’t as cold means that less heat will transfer out of the brewing vessel. #physicsforthewin“
Winter Brewing Tip #3 – Invest in a Heat Mat
While wrapping the vessel in towels can help insulate the brew, it won’t create new heat. If you love fermenting and want to keep your brews happy throughout the seasons, a heating mat can be a valuable investment. Find one that works with your location and brewing style. Some simply raise the temperature by a few degrees whereas others, like the Ferment Friend, have a built in thermostat for full control and flexibility when the weather shifts.
CLICK HERE for more about Keeping All Your Ferments Warm


Happy Brew Year!
One key tip to remember is to HEAT FROM THE SIDES. It can be tempting to place jars on top of a typical seedling or basic heat mat. However, that will cause the yeast (which like to rest at the bottom of the vessel after a few days of brewing) to continuously remain active and hungry. The bacteria are not as feisty as the yeast, so they lose the battle for food if the yeast aren’t given a break. This often leads to unbalanced brews and off flavors.
Heating from the sides nurtures the bacteria rich liquid towards the top of the vessel while allowing the bottom to remain cooler. This maintains the necessary balance in the symbiosis.
KKamp’s Heat Mat Options:
- Ferment Friend with Thermostat – Set it and Forget it!
- Year Round Heating System with Dimmer – Dial the power from 0-100%
- Essential Heat Strip – Move the heater closer or further away to regulate
*Some common heating suggestions KKamp does NOT recommend:
- Drape Christmas lights around the jar – while this is pretty, light is antibacterial so it is not recommended as a heat source. And this method only raises the temperature by a few degrees anyway – *note this does not work with LED (most lights today) as they do not produce any heat.
- Set in oven with light on – this recommendation is not as common, but it can be problematic. It is possible for the acidity of the brew to cause corrosion in the oven. Additionally, we have heard from many folks that accidentally turned on the oven before remembering the brew was inside. RIP SCOBY!!
![]()
![]()
![]()
![]()
CLICK HERE for Bottling and Flavoring Safety Tips
Winter Brewing Tip #4 – Use More SCOBY & Starter Liquid / Kefir Grains
Kombucha has its own built-in defense mechanism – starter liquid! When temperatures fall, increasing the amount of culture and starter liquid in your batch will help to acidify the sweet tea and drop the pH more quickly to prevent mold and other contamination.
For most batches of Kombucha or JUN, we recommend at least 1 cup per gallon, 2 if possible. During colder months, 2 -4 cups of starter liquid per gallon is a good minimum. You could also double the SCOBY, or do one or the other. Both the SCOBY and the liquid will provide strength to the brew.
For kefir, simply use more grains, up to double the normal amount. This will give all your brews the extra low pH boost they need to stay protected.
“Flu Shot” Flavoring Recipe
Elderberry has a legendary history over many centuries of medicinal use throughout Europe and Asia. Small but recent human studies have pointed to concentrated elderberry juice as a potential fighter of cold and flu symptoms. One study showed it had the potential to shorten sicknesses and make them less severe. There’s even preliminary evidence of anti-viral properties. We’ve tossed in the immune boosting properties of ginger and turmeric plus the extra vitamin C of rosehips for a perfect preventative in a glass.
Ingredients – per 16oz (½ liter)
- 1 tsp dried elderberries
- ½ tsp dried and cut ginger or 1 tsp fresh grated ginger
- ¼ tsp turmeric powder or ½ tsp fresh grated turmeric
- ¼ tsp rosehips
Add flavorings to a clean glass bottle. Top off with your favorite ferment. Allow it to sit at room temperature for 1-3 days, then move to the fridge if desired. Gently tip the bottle before opening to combine the ingredients throughout. May pour through a strainer to remove excess flavoring.
Winter Brewing Tip #5 – Lengthen Fermentation Time & Make More Batches


Plan for a few extra days for each batch to mature to your normal preferred taste. This may mean adding an extra batch to your brewing rotation in the meantime to help ensure you will have enough Kombucha, JUN, Milk Kefir or Water Kefir for the family to enjoy!
Fermentation Time Adjustments:
- Lengthen your fermentation time by a few days
- Start another jar so that you will have enough on hand
- Set up a batch before leaving town – even if it’s a little sour upon return, adding some fresh sweet tea, sugar solution or milk will yield a tasty product in less time
“Heart Warmer” Flavoring Recipe
In different herbal traditions, various foods, herbs or spices are assigned warming or cooling properties based on how they interact with the human body. This combination of warming spices and flavors from Ayurveda will help keep your digestive fire stoked. Plus the pretty orange color corresponds to the creative sacral chakra.
Ingredients – per 16oz
- 2 oz carrot juice (AMZ)
- ¼ tsp turmeric powder or ½ tsp chopped root
- ½ tsp dried and cut ginger or 1 tsp fresh ginger
- 1 tsp raw honey (optional)
Add flavorings to a clean glass bottle. Top off with your favorite ferment. Allow it to sit at room temperature for 1-3 days, then move to the fridge if desired. Gently tip the bottle before opening to combine the ingredients throughout. May pour through a strainer to remove excess flavoring.
Winter Brewing Tip #6 – Brew in Smaller Batches
If you have a luxury of space, to help speed your fermentation along, consider making several half batches. The surface area to depth ratio will be greater since the liquid won’t fill the vessel as much which helps to speed the fermentation along. The downside is that more jars means they will take up more space.
“Slow Burn Lemonade” Flavoring Recipe
Chili peppers contain capsaicin which gives them their spicy flavor. It also increases blood flow and circulation helping to keep the body warm. Additionally, regular consumption of foods containing some chili spice helps to reduce chronic pain and inflammation. Cayenne powder is quite powerful, so start small and then adjust based on personal taste.
Ingredients – per 16oz
- ½ pinch cayenne powder (THRIVE, AMZ)
- ¼ tsp ground black pepper (THRIVE, AMZ)
- 1 tablespoon lemon juice (THRIVE, AMZ)
- Pinch lemon zest (AMZ)
- Pinch of mineral salt (Himalayan pink salt (THRIVE, AMZ), Celtic Sea Salt)
- 1 tsp raw honey or maple syrup (THRIVE, AMZ) (optional)
Add flavorings to a clean glass bottle, then top off with your favorite ferment. Allow it to sit at room temperature for 1-3 days, then move to the fridge if desired. Gently tip the bottle before opening to combine the ingredients throughout. May pour through a strainer to remove excess flavoring.
Winter Brewing Tip #7 – Try Continuous Brew
Continuous Brew is our favorite way to make Kombucha. It’s easy, safe and when we leave 50-75% already fermented Kombucha in our vessel, it cuts down the brewing time to just days rather than weeks! Plus, if you need to take a break, provided the vessel has enough liquid, it can act like a SCOBY Hotel which you can then revive at any moment and have delicious Kombucha in just a couple of days!
CLICK HERE for more about Continuous Brew vs Batch Brew
CLICK HERE for a Continuous Brew FAQ
![]()
![]()
![]()
![]()
Have any other Winter brewing tips we missed? Leave them in the comments!


Chris
February 7, 2020 at 3:49 pmHi, this is my first winter brewing kombucha and am experiencing a slower first ferment/F1 despite using a heating pad (set at 78f), keeping 2-3 fat scobies in my jars and reside in SoCal, so not terribly cold. Is this normal?
Hannah Crum
February 13, 2020 at 2:31 pmThere are so many other factors (humidity, air flow, etc) – so yes, keeping it warm helps to prevent mold and will ferment it faster than without a heater – however, it is still common for batches to take longer in the winter even with the heat.
Atalanta
March 25, 2019 at 11:25 amWe have a cold house – 200+ years old, cold in the winter, cool in the summer. We keep the house generally at 55F in the winter and just heat the rooms we’re in (spend a lot of time in the room with the woodstove!). What heating mat would work to bring up my brew temperature to a working range in the winter?
Hannah Crum
March 26, 2019 at 8:29 amOur Pro Line would be best for that cold of an inside temperature. You can find more details about our heating mats here –> https://www.kombuchakamp.com/how-to-keep-kombucha-warm-heating-mats-pads
Buy a heat mat here –> https://store.kombuchakamp.com/heating-systems/