Are you a Microbe Master? Take Our 8-Question Quiz and Start Brewing Today!
Everything you need to know — ingredients, equipment, step-by-step directions, pro tips, and video support from Hannah Ruhamah Crum, the Mother of Modern Kombucha.
If you already know you want to make the leap into Continuous Brew, check out our Continuous Brew vs Batch Brew Kombucha (2026 Expert Guide).
This easy Kombucha Recipe was designed for anyone who wants to brew up to a gallon in their first batch. The steps are specifically arranged to create a simpler process for you.
Following this basic Kombucha Recipe also prevents contamination by eliminating the wait for the sweet tea to cool. Because you can add the fresh Kombucha SCOBY and starter liquid right away, the brew is guaranteed to succeed.

Kombucha — the ancient fermented tea — has traveled from Chinese apothecaries to modern wellness kitchens. At Kombucha Kamp, we’ve taught hundreds of thousands of people how to brew safely and deliciously at home through both time-honored traditions and our own modern spin to boost convenience, safety, and availability. It’s the perfect fusion of the ancient and the new, brought directly to you through time and lovingly tended to by the Kombucha Mamma to ensure you have the very best fermentation experience.
In 2025, home brewing has never been easier or more sustainable. Let’s get you set up the right way — safely, affordably, and flavorfully.
| Ingredient/Tool | Purpose | Link |
| 4-6 Teaspoons Tea (black, green, oolong, or blend) | Provides nutrients for fermentation | Shop Tea Blends |
| Organic Cane Sugar | Food for yeast & bacteria | __ |
| SCOBY (Symbiotic Culture of Bacteria & Yeast) | The “Mother” that transforms sweet tea into Kombucha | Starter SCOBY |
| Starter Liquid | Ensures low-pH safety from the first batch | Included in starter kits in the SCOBY pouch |
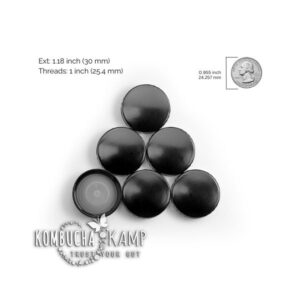
| Brewing Vessel (1 gal jar or Continuous Brew vessel) | Holds your ferment | Vessels & Systems |
| Breathable Cloth + Rubber Band | Keeps out dust & fruit flies | Included in kits |
| Thermometer or Heating Mat | Temperature control (75-85°F) | Heating Solutions |
| Flavorings (Fruit, Juice, Flowers, etc.) | 2nd Fermentation Flavorings | Shop Flavorings |
| 3 Liters Purified, Chlorine-Free Water | Prevent harm to SCOBY | __ |
Kombucha has been made for thousands of years by people all over the world because it is easy to prepare and offers immediate and long term benefits to the regular drinker. The ingredients are inexpensive and the process is simple and sustainable. However, care should be taken anytime food is prepared at home. Follow these directions to brewing success!
We call this a “short-cut” recipe because rather than boiling ALL the water and then waiting for it to cool down, we streamline the process by only steeping the tea in a portion of the boiling water, then add cool water so we can add our SCOBY quickly to prevent mold from developing in the sweet tea.
Take a look at our Mold Identification Page to learn how to recognize mold when/if it ever happens to your brew!

Bring 4 cups (1 liter) of purified water to a lively boil. This is where transformation begins — simple water, soon to be a living elixir.
Add your loose-leaf tea or tea bags directly into the pot (or your brewing vessel, if heat-safe). Let the leaves unfurl like morning dreams. These little leaves are the spark that will transform your water into Kombucha!
Allow the tea to steep for 7–15 minutes, drawing out color, caffeine, and complexity. Remove tea bags or strain leaves; what remains is possibility.
Add 1 cup organic cane sugar and stir until dissolved.
Now the secret ingredient: hopes, dreams, wishes, and affirmations — the invisible nutrients your culture craves. (This step is optional but we think it helps to send a little positive energy out into your microbes! Plus, it’s a great way to turn your brewing regimen into a mindfulness exercise, as well… two birds, one stone!)
If brewing in a separate pot, pour 2–3 quarts (2–3 liters) of purified water into your vessel first, then add the hot sweet tea.
If you brewed directly in the vessel, top up with 2–3 quarts cool, purified water. (Remember: NO CHLORINE!)
Your goal: a total volume of about 1 gallon (3.8 L) and a temperature at or below body temp — test with a clean finger or a thermometer.
Gently add your SCOBY and 2 cups of starter liquid. They’re the soul of the brew — treat them kindly.
Place a breathable cloth or custom brewer cap over the top and secure it with a band. This lets your Kombucha breathe while keeping out dust and curious fruit flies. If you want an added layer of protection, be sure to check out our Kombucha Fruit Fly Trap DIY on YouTube!
Take a moment — yes, really — to say a prayer, send good vibes, or simply thank the microbes. Brewing is cooperation between you and life itself so we think it’s important to pay our respects to the magical microbes that enliven our brew!
Set the vessel in a warm, ventilated area out of direct sunlight.
Ideal temperature: 75–85 °F (24–29 °C) — 80 °F (27 °C) is the sweet spot.
Ferment for 7–21 days, depending on taste.
Pro Tip: The SCOBY might float, sink, or swirl — all perfectly normal. A new layer will always form on top. The microbial mat – or pellicle – is a sort of seal that protects the living liquid below from bad bacteria and malicious microbes.

After a week, slide a straw under the SCOBY and take a sip. (You can also use a turkey baster to nip up some liquid to taste or ladle some out with a wooden or plastic cup – avoid metal as it may react with the acidity of your brew and harm your SCOBY.)
Too sweet? Give it more time.
Too tart? Brew a little less next round.
Keep tasting daily until it sings to your taste buds!
Before bottling, set aside your SCOBY and 2 cups starter liquid for your next batch. This is how your culture family — and your brewing confidence — grows.
If you’re not ready to expand your operation just yet, check out our easy to follow instructions for creating a SCOBY Hotel!

Pour your finished tea into bottles, leaving an inch of space.
Add fruit, herbs, or spices if desired — this is second fermentation, where bubbles and artistry happen.

Place your bottles somewhere warm for a few days to carbonate, then refrigerate. You may want to “burp” your bottles each day to avoid too much build up of pressure. (Here’s some tips to avoid the dreaded “bottle bomb” when flavoring Kombucha.)
Sip, smile, and know you just turned ordinary ingredients — plus a little hope — into living wellness.
Tomorrow, the process begins again.

“Every batch carries the energy you bring to it. That’s why we stir in dreams — because fermentation responds to intention.”

One of the very best things about brewing Kombucha at home (or Milk Kefir or Water Kefir or Jun) versus purchasing commercial brands at the store, is that you can change the flavor whenever you want… that means that you get to be as creative as you want! Some people even use their brews as a way to integrate herbal medicine, Traditional Chinese Medicine, and Ayurveda into their brews for an extra boost depending on their various health goals.
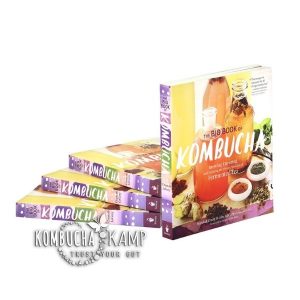
Here are just a few of our favorite flavor combos for each season. Of course, if you’re looking to supercharge your brewing experience and gain access to a treasure trove of 1st fermentation and 2nd fermentation recipes, along with everything from pancakes to punches, you will want to be sure to grab a copy of The Big Book of Kombucha. (Hannah’s first book has widely become known as the “Bible of Kombucha” and will serve you very well throughout your fermentation journey!)
| Spring | Strawberry + Basil / Lavender + Honey |
| Summer | Pineapple + Mint / Mango + Lime |
| Autumn | Apple + Cinnamon / Pumpkin Spice |
| Winter | Cranberry + Orange Peel / Chai Spice |

Once you’ve mastered a few batches, consider switching to Continuous Brew, where you draw off Kombucha as you drink it and add fresh tea to keep the system alive.
It saves time, stabilizes flavor, and boosts probiotic density.
Learn more in our companion guide:

One thing that we always encourage new fermenters to keep in mind is that fermentation – much like life itself – is a living, breathing process. This means that there is always room for natural variations in flavor, color, carbonation and more. It also means that sometimes… things just go wrong! But it’s like Kombucha Mamma says: An ounce of prevention is worth a pound of cure.
Here’s a quick guide to some of the issues that you may encounter when brewing your first few batches. Just like in life, the more you have prepared ahead of time, the easier to manage problems become as they arise!
Of course, at Kombucha Kamp we find a great deal of joy in getting to know new fermenters and helping to guide them on their fermentation journeys. That’s why Mamma also offers live troubleshooting with the purchase of every Deluxe Kombucha Kit! You can also schedule a Homebrewer Laser Session to troubleshoot with Hannah in real time!
Problem | Likely Cause | Fix |
Mold (fuzzy, green, or black) | Temperature too low, not enough starter | Discard & restart with fresh SCOBY |
Too sweet | Under-fermented | Add 1–2 days fermentation |
Too sour | Over-fermented | Shorten time or blend with fresh tea |
Flat / no fizz | Bottles not sealed, too short 2nd Fermentation | Use swing-tops, extend 2–3 days |
SCOBY sinks | Normal variation | No action needed |
When you start brewing Kombucha, it is inevitable that you will find yourself a veritable treasure chest of SCOBYs… Your SCOBY will grow new layers each batch and each new SCOBY is a new opportunity for another Jar or Vessel of ‘Booch! So before you become overrun with SCOBYs, take care to review some of our other resources to help you care for your SCOBYs in whatever way speaks to you most!
You can:
Kombucha Kamp was founded by Hannah Ruhamah Crum, co-author of The Big Book of Kombucha and co-founder of Kombucha Brewers International, the trade organization dedicated to spreading accurate information bout Kombucha, pushing for standardization of process and language in the commercial Kombucha brewing space, and lobbying for legislation focused on helping to make Kombucha more accessible to the general public (via the KOMBUCHA Act)
.
With more than 20 years of teaching and research, we provide the world’s most trusted kits and guides to brew confidently at home. All of our heirloom starter cultures are lovingly tended and DNA sequenced to provide the highest quality for the most fail proof brew available. Our cultures have been trusted by dozens of commercial brands and we are very proud to offer them to home brewers, as well.
Start Today:
7–10 days for first fermentation, plus 1–3 days for carbonation (optional). Time can vary depending on temperature and various other factors, so just be sure to keep tasting your brew until it has reached your desired level of tartness.
Keep between 75–85°F (24–29°C) for safety and balanced flavor.
The easiest way to ensure consistent temperatures, especially if you live in cooler climates, is by investing in a heating system. These allow your brew to stay the perfect temperature year round and go a long way towards making sure that you can produce consistent, reliable results.
Decaf tea weakens fermentation; use regular tea. Honey is for Jun Kombucha (different culture). Keep in mind that the yeast and bacteria that make up your SCOBY help to reduce the amount of caffeine in the final product, so you will be getting a tea lower in caffeine than when you begin. In fact, Kombucha has about ⅓ the caffeine of a cup of tea, on average. But it’s also possible to reduce that amount to even less.
Caffeine helps drive the fermentation process and nourishes the SCOBY. But not everybody can tolerate the buzz and jitter, even the low amounts left after brewing. Most of the caffeine in Kombucha is utilized in the fermentation process by the organisms, but if your brew is keeping you buzzed at night, try one of these low caff/no caff variations.
Lower Caffeine: There are a couple of ways to lower the caffeine. First, combining one or two bags of black or green tea with rooibos will minimize the caffeine. White tea also may have less caffeine, so use it by itself for a very mellow flavor. Combine this with the steep and dump method to minimize the caffeine while still providing some for the culture.
No Caffeine: The Kombucha culture is “flexible technology” which means it can ferment a wide range of substrates (fancy word for types of tea). If completely caffeine free is the only way you can enjoy the booch, then steep 3-5 bags of your favorite herbal tisane such as chamomile (3-5 teaspoons of loose leaf) or hibiscus petals (bonus, pink SCOBY!). Some types of herbal tea may prevent the SCOBY from forming properly so use a backup from your hotel. Another option is decaf tea. If the SCOBY starts to look weak on any of these substrates, then give it a batch of sweet tea with regular caffeine to renourish. You don’t have to drink it (give it to your friends!) and it will keep your mother chugging along.
Kombucha in the bottle never “goes bad” as long as no mold is present. However, it may eventually be too sour to enjoy. (Don’t throw it away! Check out our page on ways to use Kombucha Vinegar!) Refrigerated Kombucha stays fresh for months — flavor continues to evolve slowly.
Flavoring can help with sour Kombucha. Next time simply shorten the brew cycle in your Kombucha recipe, meaning taste earlier in the process and bottle when it’s still a little sweeter than you like. And don’t throw away that sour Kombucha, you can use it to start a SCOBY Hotel!
Drink as desired! Start off with 4-8oz (100-200ml) on an empty stomach in the morning, then with meals to help with digestion or as your body tells you it would like some more! Drink plenty of water as it is a natural detoxifier and you want to flush the newly released toxins out.
Yes! To dechlorinate tap water, allow to sit out overnight uncovered or boil for 10 minutes, then cool to needed temp.
Always use cotton cloth covers to allow oxygen to reach the brew. Only cloth with a tight weave should be used. Clean used t-shirts or sheets are a great option. Avoid cheesecloth as the holes are too large and will allow fruit flies and contaminants.
Soap is not needed when rinsing the brewing vessel between batches, unless there was mold or some other brewing issue. If the brew was successful, all that is needed is a clean water rinse.
Should mold or other brewing issues occur, clean with hot water and soap, then rinse very well with clean water. If the jar has a spigot, remove it and soak in soapy water or bleach to kill any spores, then rinse clean. All items can be cured in distilled (pasteurized) white vinegar. Never use raw vinegar with Kombucha to avoid spoiling the brew.
To make larger batches, scale the amount of SCOBY and starter liquid with the other ingredients. For a larger Kombucha recipe, one large SCOBY and 1-2 cups starter liquid is recommended per gallon of sweet tea. Batches over 5 gallons in size can experience issues of uneven fermentation.
If you see mold then throw everything away. All the Kombucha SCOBYs and the liquid in the jar could have mold spores even if mold is not visible. Kombucha Cultures are not salvageable when mold strikes.
Glass, Porcelain/Ceramic/Stoneware, Stainless Steel, and Wood are the most common brewing vessel materials. Plastic may be acceptable but is not recommended. Find out how to select a brewing vessel with or without a spigot here.
Kombucha requires real tea, Camellia sinensis, so that it can thrive over time. That means unflavored black, green, or white teas. Decaf or Flavored teas (which are often actually tisanes) should be used in experimental batches. More about types of tea to use here, and exotic types of teas/flavored teas here.
No, we do not recommend rinsing SCOBYs, but you can remove the yeast by hand if there is a lot present. If you really want to rinse them off, use already fermented Kombucha from your hotel.
Yes! Cutting the SCOBY will not harm it, and brief contact with scissors or a knife is not an issue, even if not stainless steel.
While some of the sugar is consumed during the process, there is residual sugar in Kombucha, otherwise we would never be able to drink the healthy acids in the brew.
On average there are between 2 and 8 grams of sugar in each 8oz glass, depending on fermentation time. However, that sugar is also broken into fructose and glucose, not just sucrose. For more about Kombucha and Sugar click here.
All naturally fermented food items have trace amounts of alcohol present, depending on the process. Finished Kombucha has between .2% and .8% alcohol on average, and is not intoxicating. The amount present can be limited by maintaining refrigeration of the brew after bottling and by limiting flavors added to those that are sugar free.
Continuous Brew Kombucha is a way to make more brew, faster, with less effort. For anyone who loves having homebrew Kombucha available, it’s a great option. Check out our Guide to Continuous Brew Kombucha for more!
YES! Simply start a SCOBY Hotel (video). Or if you are doing Continuous Brew, you can just leave the SCOBYs and liquid alone in the vessel for many weeks and start over when you return… it will act as its own Hotel.
Want to have extra flavor and power to your brew? Are you the kind of Kombucha drinker that likes the strongest brew you can get? By increasing the amount of sugar and tea used in the initial sweet tea prep, this Kombucha recipe variation provides more fuel for the brew to create healthy acids. Everything else will be present too, including enzymes, tannins, antioxidants, and residual sugars, making for a mouth puckering brew. Because there is a little more sugar remaining in the brew, it should also carbonate very well in the bottle, so be careful!
Try 1.5 cups of sugar per gallon, and up the tea to 9-12 teaspoons (3-4 tablespoons). If that’s not strong enough, raise it to 2 cups sugar per gallon. For even stronger tea, use all black tea and rather than adding more simply steep longer, 30-60 minutes.
When following these Kombucha recipe modifications, maintaining correct temperature is even more important as the extra sugar is vulnerable to mold. At least 80F is recommended for best results. Also brewing time will likely increase by 3-5 days on average.
In the age of Google and social media, it seems everyone’s got “THE answer” for how to brew Kombucha — from Aunt Alice to Blogger Betty to “Cheap SCOBY Seller Chet.”
But here’s the truth: most of what’s floating around out there is recycled misinformation from people who’ve brewed a handful of batches (if that). And many of the most common sites out there are run by people interested solely in making money… not in respecting the ancient traditions lovingly passed down by Kombucha Kamp.
At Kombucha Kamp, we’ve been teaching homebrewers around the world for nearly two decades — long before Kombucha became a trend. We’ve seen just about every myth, mistake, and mold-covered jar there is. So before you trust a random blog post or a too-good-to-be-true SCOBY listing, check out these common Kombucha myths and the facts that actually keep your brew happy, healthy, and safe.
Truth: Cheesecloth is never a good choice. Its loose weave lets in dust, fruit flies, and spores that can ruin your batch. Even folded layers won’t cut it. Instead, use a clean, tightly woven cotton cloth (like a napkin or tea towel) secured with a rubber band.
Truth: Kombucha doesn’t scale that way. Too much sweet tea and not enough SCOBY (or starter liquid) slows fermentation and increases the risk of mold. Use one healthy SCOBY (about 5–6 inches across and ½–1 inch thick) and1–2 cups of strong starter liquid per gallon of sweet tea.
Truth: Not even close. Starter liquid is alive — it contains the yeast and bacteria your brew needs to start strong. Vinegar only lowers pH; it doesn’t inoculate the batch. Always use liquid from a previous brew or SCOBY Hotel, never plain vinegar.
Truth: Dehydrated SCOBYs rarely recover. They can’t reproduce effectively, and many develop mold before they even wake up. Always start with a fresh, living SCOBY for consistent, safe results.
Truth: SCOBYs naturally darken over time due to tea tannins and yeast activity. A light or medium brown color means it’s healthy and doing its job. Only retire a SCOBY that’s black, falling apart, or smells off.
Truth: Both old and new SCOBYs are valuable! The older one has experience (and flavor depth), while the new one is young and vigorous. Keep them both — one for brewing, one for backup or sharing.
Truth: Not exactly. Brief contact with metal utensils won’t hurt your culture. Long-term exposure to reactive metals like aluminum or copper, however, can leach toxins into your brew. Stainless steel (grade 304 or higher) is perfectly safe — in fact, many pros use it for large-scale brewing.
Truth: The fridge doesn’t preserve a SCOBY — it hibernates it. Cold temperatures stall fermentation and make your next brew sluggish. Store your SCOBYs at room temperature in a SCOBY Hotel and refresh it every couple of months for happy, active cultures.
Truth: SCOBYs grow to fit their environment. Even a small one will spread out and form a perfect new layer across the top of your brew — that’s what they do best!
Truth: Nope! The bottom layer is heavy with yeast sediment, which can throw off the balance of your next brew. Use liquid from the top of your last batch — it’s rich in healthy bacteria and ready to get the next one fermenting fast.
Don’t trust every “expert” on the internet — trust experience. Kombucha is a living process, and the best advice comes from those who’ve brewed thousands of successful batches (and cleaned up just as many experiments gone wrong).
At Kombucha Kamp, we teach the why behind the brew, so your booch turns out delicious every time — no myths, no mold, no wasted tea.


 family-owned
 over 5,000
  100,000+ happy
  exceptional
  only fresh living
  lots of free articles,